1:
My game was fairly different from the original in that the game has apples at on point each while Pac-Man has 10 each. the concept of getting as many points and "ghosts" chasing you still remained the same although I used special apples to gain more points and make it easier.
2:
To make the game different I added two different power ups, I also made the map an en even square that was different from the regular square or rectangle. there is only one life for the cycle which makes it harder and is different from the original which gives you three.
3:
Making the map, I had difficulty when I found that may map was too big and had too many apples which slowed the game. to fix this I had to lower the number of apples I used by a lot. I also ran into trouble when I tried to look at the map, the walls around the edges were too tall, not allowing me to have full sight of the map, which I fixed by lowering the walls.
4:
When beta tested, I received feedback that my "ghosts" were too slow and that my "ghosts" were programmed wrong to wander around when not seeing the cycle. To fix what was suggested, I sped up the "ghost " in the programming and slowed the cycle. Also, I asked a couple of my friends and the teacher to find out how to program the "ghost" to wander.
5:
To improve my game, I would find a way to make the power-ups more effective and make it a little harder to play. I would have liked to create a power-up that allows the cycle to fight back although I do think it would be too complicated for me. I would also like to add more "ghosts" as the large map I used often had the "ghosts" wandering around the center of the map and not reaching the cycle.


Kodu "ghosts" programming:

Screen shot of my Kodu Pac-Man map:

My game was fairly different from the original in that the game has apples at on point each while Pac-Man has 10 each. the concept of getting as many points and "ghosts" chasing you still remained the same although I used special apples to gain more points and make it easier.
2:
To make the game different I added two different power ups, I also made the map an en even square that was different from the regular square or rectangle. there is only one life for the cycle which makes it harder and is different from the original which gives you three.
3:
Making the map, I had difficulty when I found that may map was too big and had too many apples which slowed the game. to fix this I had to lower the number of apples I used by a lot. I also ran into trouble when I tried to look at the map, the walls around the edges were too tall, not allowing me to have full sight of the map, which I fixed by lowering the walls.
4:
When beta tested, I received feedback that my "ghosts" were too slow and that my "ghosts" were programmed wrong to wander around when not seeing the cycle. To fix what was suggested, I sped up the "ghost " in the programming and slowed the cycle. Also, I asked a couple of my friends and the teacher to find out how to program the "ghost" to wander.
5:
To improve my game, I would find a way to make the power-ups more effective and make it a little harder to play. I would have liked to create a power-up that allows the cycle to fight back although I do think it would be too complicated for me. I would also like to add more "ghosts" as the large map I used often had the "ghosts" wandering around the center of the map and not reaching the cycle.
Cycle programming:
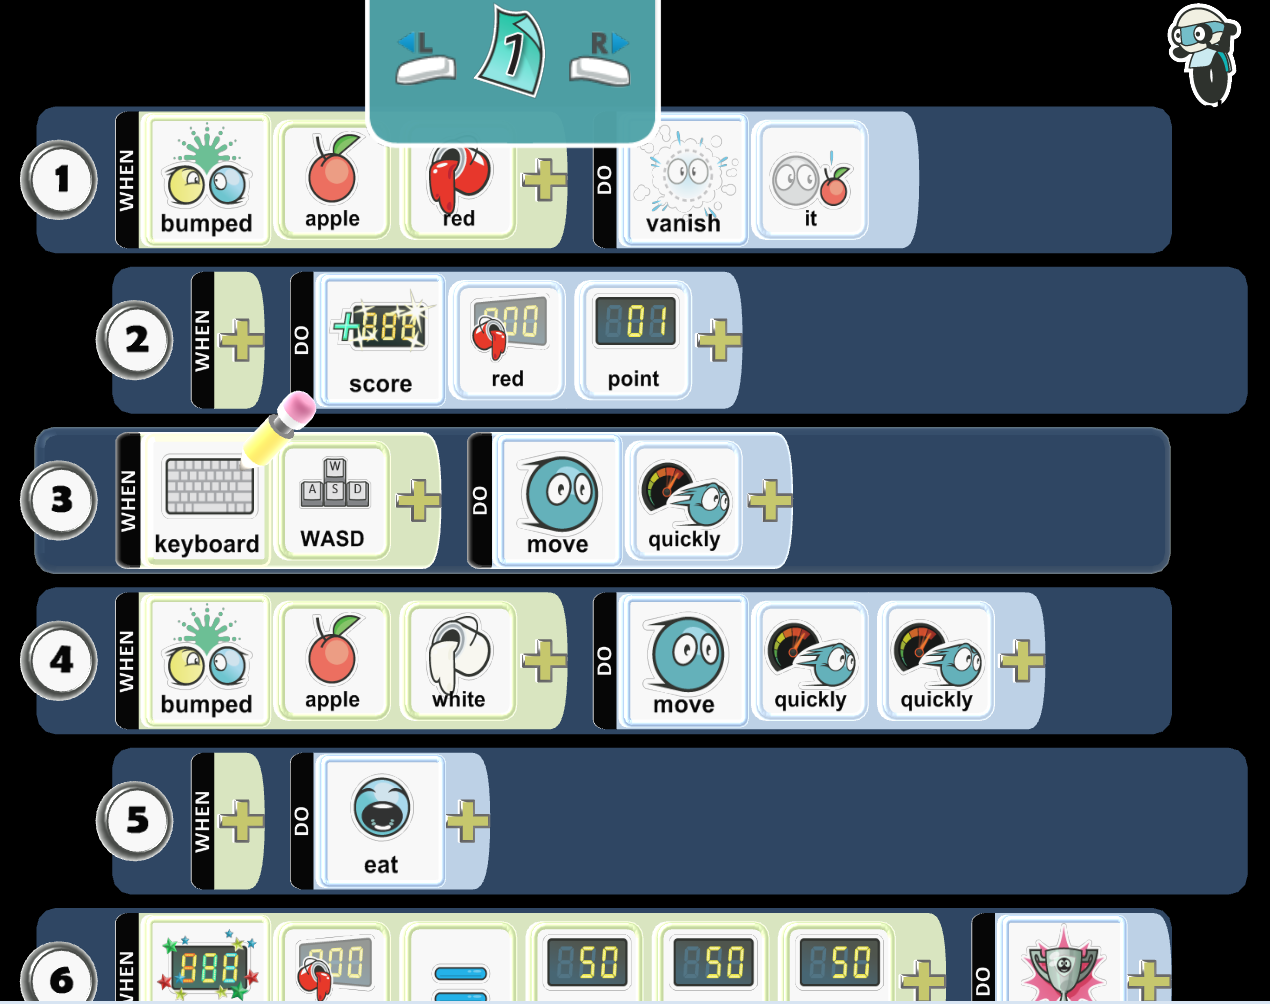

Kodu "ghosts" programming:

Screen shot of my Kodu Pac-Man map:

Comments
Post a Comment